
First and foremost, since the subject will no longer matter in terms of how good or how rare of a photo it is because of this "saturation" of photographs, how you photograph the subject is going to be the most important aspect. Composition will be the key. What kind of substance can you give to your photograph that other people may not have the vision or ability to do? There are several different ways to achieve strong composition. My favorites, or the ones that I most commonly use, are what I will be talking about.
The first thing I look for in a scene is directionality. Is there a certain point that will draw attention to itself, other than the subject? If so, then accentuate it. Now, when I say directionality, I am talking about the general flow of direction. Be it the way the bird's facing, how its body is positioned, or patterns in the background that draw attention, use those to your advantage. This will often go hand in hand with a generalization that I like to call "the rule of thirds", which is something I normally use in post-production rather than the original process of taking the photograph.
"The rule of thirds" is my way of saying framing is important. Now, with one of my computer's editing programs, My crop box has sections that make it easy to determine my subject positioning. The rule of thirds is aligning your subject in one of three sections either vertically or horizontally in the photograph. I also like to say it is being "appropriately sloppy". Basically, people are always told a photograph is best when the subject is centered in the photo. That is not always the case. Now, this always works best when there is a certain flow of direction in the photo. Here is an example.

In this photo of an Eastern Phoebe, a relatively common and drab bird, the overall direction of the photo makes you look from left to right. This is partially due to the direction of the bird's gaze, but also partially due to the contours of the branch it is perched on. The bird is placed slightly into the left-hand third of the photo, and this brings a certain sense of balance to this photo because something is in good focus all the way across the frame from left to right. I hope you agree that it adds a certain effect that makes it look better than if the bird were directly in the middle of the photo.
The above photo also makes good use of scenery. The branch is just as much a part of the photo as the bird itself. Ask yourself this: What is around the desired subject that may add to the photo? The answer could be plants in the background, the tree the bird is sitting in, or possibly other animals around the bird. A photo immediately becomes better if more than one of any subject is present, and in good focus. Try to include something either on the same plane of focus as the subject, or in the background, it's better than just the subject and nothing else. Here is another example.
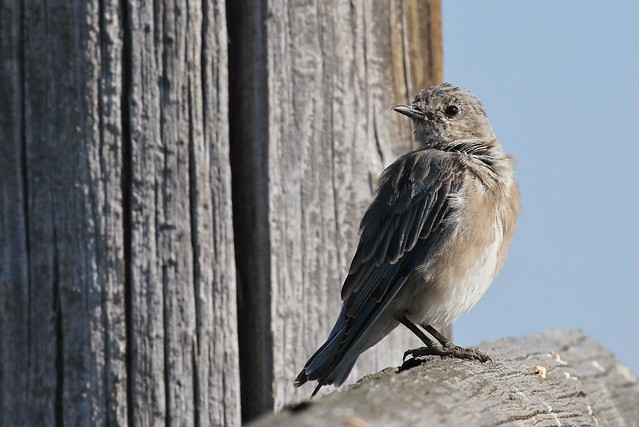
Here, we have a young Mountain Bluebird sitting on an old wooden fence. Using the post as the background instead of just a bunch of blue sky, added an element of depth and more detail to the scene.
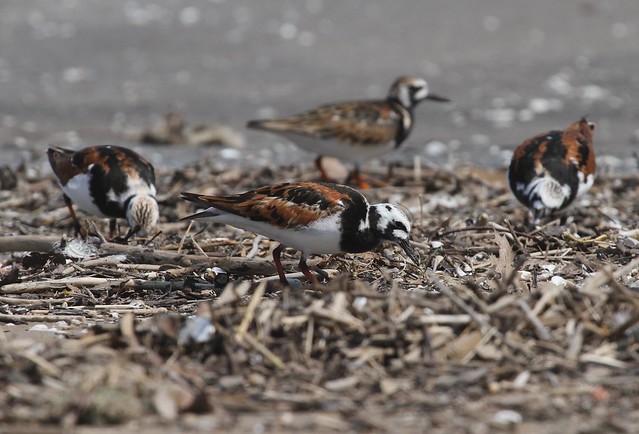
Now, there are times when scenery can be a disadvantage too. The best you can do in these situations, is try to turn a negative into a positive. Try to use that scenery to accentuate your subject. Bird photographers know the frustration of seeing their subject in the middle of a dense bush or leafy tree all too well. But, when life gives you lemons, you're supposed to make lemonade, no matter how sour those lemons may be. Here are a couple of examples.
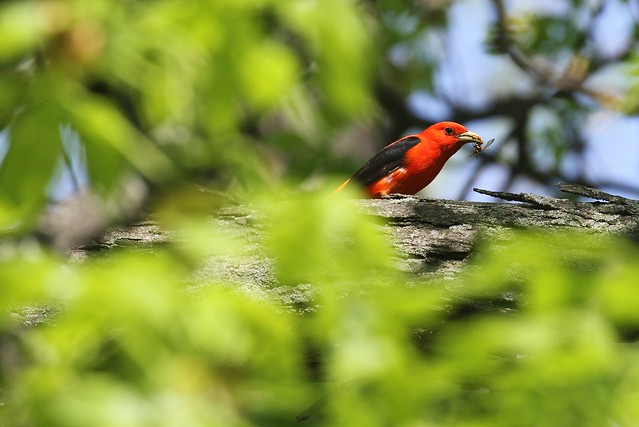
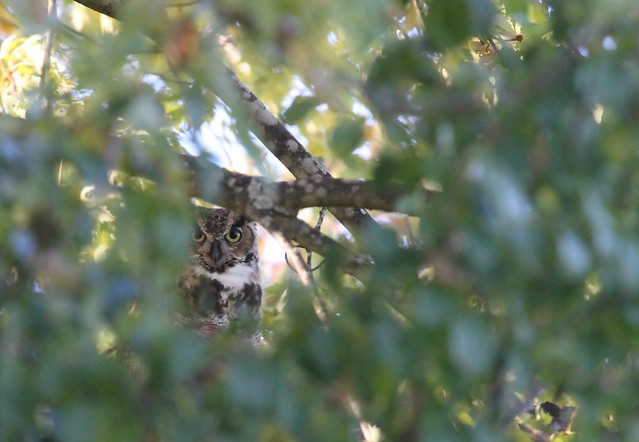
These two photos show clutter in the foreground, but the clutter gives a framing effect. This helps to draw your attention to the subject even more. Mmmmm, that's good lemonade, it just took a little bit of sugar (or a positive outlook as the case may be).
Now then, while a bird sitting nicely is never going to be something I will complain about, sometimes a little bit of action makes the shot that much better. If you can catch some action that others may have missed, then your photograph immediately becomes more attractive. This will require patience and timing. Stick with a subject as long as you can, something will probably come out of it. I learned this the hard way, watching a White-Tailed Kite that was far off in the distance. I decided to call it quits, and found out later that 10 minutes after I had left, the Kite flew directly over where all the photographers were standing, including where I was. Darn!
Timing is also important. Watch the bird for behavioral patterns, something that tells you what its next move will be. If you can predict its next move, you have a better chance of getting that action shot. Always have your camera at the ready, using a tripod can help with this. Think about this when viewing the next two photos: Which of these do I think is better?


Each of these photos are good in their own ways, but considering the second photo captured a moment of action, forever frozen now in a photograph, that one will widely be considered better.
Two other things can really add to a photo. Angles will help a photograph, especially when photographing shorebirds and waterfowl. Lower angles will be more appealing. So the next time you can, lay down on that boat, or kneel on that beach. Get low and try it!
Lighting is the other thing, be careful of when you are shooting, or where you are shooting. Photos that are too bright lose detail, sharpness and color. Try shooting early in the morning on sunny days, or late in the afternoon. These are called the "golden hours" because they give photographs taken in these times warm golden glows. This adds to color, and makes the images more inviting. However, you can't always shoot just in these times, so get out there and experiment, shoot at all times!

Now I know this post has been a long one, so thanks for sticking with it until the end. The last thing that will make your bird photos stand out above others is... QUALITY! Strive for the cleanest, sharpest image you can get! It makes all the difference. Thanks for reading, and I hope you find this to be helpful!!
Brendon Lake
Excellent article Brendon, looking forward to many more!!
ReplyDelete